Replacing the forestay
In June I started replacing the standing rigging, but the shrouds are relatively easy to do. The big one is the forestay because it involves removing the forestay from the furler system and means taking the mast down!
So… step 1: Turn the boat around
OK, the photo isn't really necessary except Helen on the bow looks like we're off whale fishing and she wants to spear the whale!Step 2: take the boom off and put it in the cabin.
Step 3: Remove all the electrical connections from the mast
Ummm… that wasn't as easy as it should have been as the nuts under the deck kept slipping!
Step 4: Drop the mast and take the forestay off… no photos because everyone involved with this process... two lines from the top of the mast and two people catching it as it came down!
Step 5: Remove the cone from the furler
Attempt 1: Dig out all the corrosion with a small screw driverStep 4: Drop the mast and take the forestay off… no photos because everyone involved with this process... two lines from the top of the mast and two people catching it as it came down!
Step 5: Remove the cone from the furler
Result: Failure
Attempt 2: Fill up with WD40, try again, fill up with WD40 again and leave overnight
Result: Failure and somebody stole my workmate!
Attempt 3: Attach to a lamp post, put under pressure with my van and try hammering
Result: Failure the weld broke!
So -- cost of replacement furler €900 (forget it) and company out of business who made my furler so need to build replacement parts myself!
Time for CAD on the computer:
Then separate the components to create drawings from which they can be created, first the block:
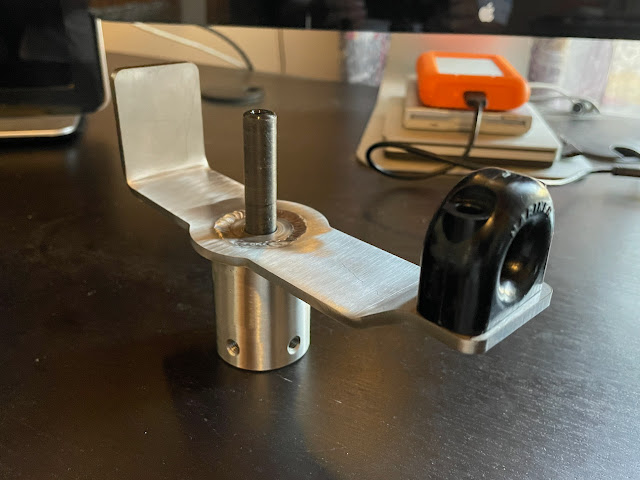
The block needs to take a Norseman type fitting and then a plastic bearing. This time I will make out of stainless steel so that I don't have electro-corrosion from dissimilar metals! Off round Larnaka and through a friend of a friend find a piece of 40mm stainless steel rod. No cost! Take it to another friend who puts in on a lathe and from the drawing makes the part I need! I buy a toggle too so that it will have movement... looks good!Now CAD for the plate:
This time I upload the file to AndreouLaser and they cut and fold it from the CAD file directly.
Next to TechnoMetalliki to get Vassili to weld the two parts together.
Then by the time the eye and plastic bearing is fitted I should have a working furler again:
Step 7: Restep the mast (again no photos)
Step 8: check all the rigging -- dark by now, thank goodness for headlamps!
Yes, all the standing rigging now replaced!
Oh, and I also made a couple of triangles for the backstay to make that more stable…


Comments
Post a Comment